-Clinique High Impact Mascara ($20)
-Prestige Waterproof eyeliner in Cocoa ($7)
-Prestige eyeliner in Golden brown ($3--> got it on sale)
-Makeup Forever Aqua Eyes Champagne 23L (metallic pink champagne)
-ELF Mineral Eye Primer ($1.50--> normally $3 but used a coupon code)
-Crown Brushes: Deluxe Oval Shadow ($3), Small chisel brush ($2) , Mascara brush ($3), 88 coastal scents warm palette ($20)


1)Prime your eyes
-By doing so, you have insured your eyeshadow to last longer and won't crease. Also it will make your lids a little sticky so that your colors will be more vibrant.

-apply and blend into lids
2) Apply a nude-ish color for a wash of color.
-use a big dense eyeshadow brush and take some of your nude color


-this color that i choose is a frosty white with gold shimmers; left hand top corner from the 88 warm palette
3) Eye lining-Line really close to your lash line; here it doesn't matter if it is messy because the next step will fix it.

-I use a brown instead of black because it looks more natural and throughout the day when it smudges, it won't be as visible.

*TIP: when eye lining your eyes, close your eyes, place your finger on your lid and lift your lid just a little bit, exposing the lash more then normal. Then LINE!*
4) Smudging it out 
-pick a dark brown color and load it onto your small detail brush (doesn't' matter which kind it is, as long as it is small and dense and can do detailing)


-start smudging from the middle of your lid and make your way to the edge; don't do the winged tip yet though
5) Winged tip
-use the tip of your tiny dense brush and make the winged tip with eyeshadow (reason for this is, it will give you enough drama for daytime without "trying too hard" and being too harsh)
-open your eyes to calculate the degree of your wing (not literally)
 6) Water lining
-Lining AGAIN? XD yeah....take a golden bronze color and line your water line. Remember not to tug on the bottom lash line because it is very delicate there.


What it looks like now... All we need now are the finishing touches...
7) Lashes
-Curl your lashes and put a coat of mascara

 8) Smudge Bottom lash line
-select a dark reddish purple and smudge it on your bottom lash line
 9) Highlighting

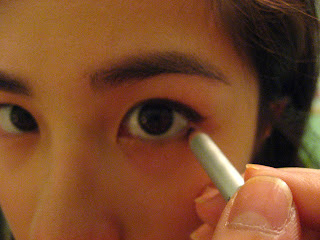
-Take your white eyeliner and line the inner corners of your eyes. In this case, I'm using a champagne color for a more natural looks.
FINISHED LOOK...


 The holiday seasons are coming up and i thought i would do a christmas look. I just started with a simple red, added a green and then hints of gold. It just screams christmas don't you think? I did this look backwards though. Usually i would start from the inner lid first, but i did the crease first and then built my way into the inner crease.


 Main color palette
 This quad reminded me a lot of the sea, so thats my inspiration. Basically this is how I work, I look at some colors and BAM, instant inspiration. XD
 First step is to use a eyeshadow primer or base. Here i'm using ELF mineral eyeshadow primer which is very comparable to Urban Decay primer potion or Too face shadow insurance. And no the primer on my eyes right now isn't blended.

 To enhance the colors of the eye shadows, I'm using the light blue in my Make up forever flash palette ($100 retail price) and the white in the inner corners of my eyes.
 Take a dense eyeshadow brush (like ELF eyeshadow brush $1) and dip it into the light golden color in Teal dream.
  Place the light golden color where the light naturally hits on your eyelids, so basically right in the middle and just pat the color on. If you want, you can spray a little bit of water onto your brush to maximize the color depth.
 Take the blue color and place it right on your natural eye crease. To do so, look at your mirror at a 45 degree angle so your eye socket will show better. Then just do your thing!
 Use a blending brush (I used Elf's blending brush $1) and take the second darkest purple from the quad "Sliver Lining" ($1).
  Tilt your head yet again and make the sideways V in the corner with the dark purple.
 It should look something like this.
 Take the brown color from "Hazy Hazel" and blend out the purple so its not too harsh.
 Now go back to that green from "Teal dream" and use the same blending brush.
 Place the green in the corner and brush it a little bit so that it peeks out from the corner, but doesn't cover the golden color.
  Take back that Studio concealer brush and use the leftover cream eyeshadow and place it on your bottom lash.
 For your bottom lash, take that green from Teal dream and dark purple from Silver lining and smudge it on your bottom lash.
 Line your eyes and put on some false lashes if you want! And voila~~ the finished look =). Hope you guys like it.


